IF I MAY BE FRANK(ISH) . . .
While electronically thumbing through old issues of Slingshot (The Journal of The Society of Ancients), I happened upon a one-page article written by Peter Glew that caught my attention. In “Fun with Franks: A Forgotten Army” (Issue 211, September 2000), Peter briefly reviewed his “history” with the Franks and admitted his “rookie” status with respect to DBM competition play. He mentioned a couple of letters published about warband armies in Issue 204 of the long-running publication as well as referenced an article in Miniature Wargames 143. In order to establish a bit more context, I searched for and studied the letters. Unfortunately, I did not have that particular issue of MW. However, I did take a few additional moments to look over the Early Frankish entry and historical notes on page 62 of Book 2 of the D.B.M. Army Lists. I also looked at the Franks et al., list found on page 133 of L’Art de la Guerre - 3rd Edition. Peter described the painting and other preparation completed by him and his eldest son so that they could participate in the Devizes Show or Tournament. The gentleman then provided four reports or short summaries of the games played by the father and son team. One of these briefs consisted of just two sentences, containing a grand total of 18 words. (Note: There were no orders of battles, maps, or pictures included with Peter’s submission. Even so, I still found it interesting and inspiring, hence this derivative post.) He closed with an overall assessment—of the chosen miniature army and not the experience—which would be fair to describe as negative. While one could win the occasional “overwhelming victory,” Peter decided that he could not, would not recommend the purchasing, preparing, or playing with a Frankish army to a fellow ancients wargamer.
Though what follows is an imitation instead of wholly original, a repeat of the trials and tribulations of the Glew dynamic duo seemed like an excellent idea for a short-term project. In addition to occupying some of my spare time, the planned four games or scenarios would provide a great opportunity for additional practice as well as the chance to gain some much-needed experience with the TRIUMPH! rules.
Preparations
At first, I thought I would keep things simple. I would hastily fabricate some markers or “sabots” instead of my usual color counters (even though these are often off-putting to dyed-in-the-wool traditional historical wargamers), for several normal-size games, wherein 48-point armies faced off against each other. Based on my experience using Spartans and Vikings, I figured that these several contests would take around six hours total. Like Peter Glew, I would not bother with or include pictures and maps. However, I did think it important to include orders of battle and some sort of deployment diagram at least. Given my habit of typing rather long sentences (sometimes—ahem . . .), I figured that each of my narratives would run between 750 and 1,000 words.
As I studied the several army lists, I changed my mind. The format and estimated length of the reports would remain the same or very close to it, but the size of the scenarios would be increased so that armies containing close to 144 points each would do battle on my tabletop. [1] Looking over the three base widths provided in Appendix A (Troop Types), I decided on a “Goldilocks” course of action. My units would all have a frontage of 60mm. This would mean that a movement unit or MU would be 3 cm, which would result in Bad Horse or Javelin Cavalry being able to gallop up to 24 cm or nearly 9.5 inches per turn, while Heavy Foot units would move 9 cm or approximately 3.5 inches each turn.
Prior to building the first pair of armies, I set up the large version of my playing surface. (Note: As mentioned in previous posts, in its extended version, my tabletop is 10.5 feet wide by 3.75 feet deep. These are unusual dimensions, I admit, but they work for me.) The table was divided into 12 equal sections using thread of an appropriate color. This was done so that the placement of terrain features/pieces and the deployment of forces would be a little easier and quicker.
Scenario 1: Franks vs Patrician Romans
Working my way, albeit clumsily, through the ‘Set Up Sequence’ and subsequent steps detailed in Sections 20 to 28 of the rules, it was determined that the Franks were invading Roman territory (no real surprise there), so the Romans were able to choose the topography. Having a choice between Arable and Hilly, I (or they) opted for Arable. (Arable topography mandates having a village on the battlefield, and if my Spartans vs Vikings adventures were any indication, I do like having a village or something similar on my tabletop.) The Romans also gained the tactical advantage. As the commanding Roman on the pretend field, I wanted more terrain features, and the dice complied, producing seven pieces in total. In addition to the built-up-area and a stream, there was a large woods, two large hills (one steep, one gentle), a patch of rough ground and finally, a plowed field. As both the high-ranking Roman and the physically impressive, fierce, and veteran king of the Franks, I—that is we—decided not to entertain the idea of a flank march. Only the Romans would have a camp on the field. As per usual, it was solidly built. For this first of four planned scenarios, all commanders/generals were given the usual +1 modifier. There were no superior or inferior officers identified. Fortunately, assistance was provided on the TRIUMPH! Forum, and the look of the landscape was established by a couple of die rolls. The first turned up a 4; the second roll resulted in a 3. (Please see https://s3.us-east-2.amazonaws.com/wgc- ... let-v2.pdf.)
Assuming the role of the Roman general, I mounted my splendid horse, and escorted by various aides and a small bodyguard, arranged the assembled troops in the following manner. On the left of my line, just in front of a large gentle hill, there were 4 units of Horse Bow (Alan horse archers), 4 units of Javelin Cavalry (Equites), and 3 units of Light Foot (Garrison auxilia). The commander of this corps or wing was with a unit of Equites. The view from approximately 1,000 feet above the ground, looked like this:
HB HB JC JC JC LF LF LF
HB HB JC#
The central command was composed of the following units: 1 unit of Knights (Alan Lancers), 6 units of Raiders (Auxilia Palatina), 3 units of Elite Foot (Legionarii), and 2 units of Skirmishers (skirmishing bowmen). Their deployment was:
Sk Sk
KN Rd Rd Rd ElF ElF#ElF Rd Rd Rd
[fortified camp]
The right wing of the army consisted of the following troop types: 6 units of Elite Foot (Legionarii), 3 units of Raiders (Auxilia Palatina), 2 units of Artillery (Bolt-shooters), and 1 unit of Knights (Germanic Lancers). I would ride with the German cavalry and command from this sector. My loyal and veteran subordinates would be in charge of the center and left.
These formations were deployed in this fashion:
ElF ElF ElF Art ElF ElF ElF Art Rd Rd Rd [stream]
KN$
If my numbers are correct, the Romans had 35 units present for the planned engagement. These artillery, cavalry, and infantry units added up to 129 points. Admittedly, this was 15 points off the 144 points permitted for a GRAND TRIUMPH! engagement.
From the Frankish side of the field/table, there were also three commands. The vast majority of units in this army, however, were Warriors. There was a dearth of terrain features where the Franks deployed for battle. A village was on their left, but it had not been occupied nor put to the torch by the Romans in order to deny the real estate to the barbarians. On their right flank, but much closer to the Roman line, there was a large woods. Otherwise, the ground was flat and open. Well . . . there was a cultivated field forward of the Roman line and in the approximate center of the field/table.
The Frankish command on the left looked like this:
Sk
LF Wr Wr Wr Wr Wr Wr Wr LF
Wr Wr Wr Wr$ Wr Wr Wr
In the center, the barbarians placed the following units:
Sk Sk
Wr Wr Wr Wr Wr Wr LF
Wr Wr Wr#Wr Wr Wr
And on their right, the Franks arranged:
Wr Wr Wr Wr Wr JC JC JC
Wr Wr Wr#Wr Wr
Based on a quick count and then repeated addition, the Franks had 45 units mustered for battle. Their army value was determined to be 138 points, which was closer to 144 points, but still not quite there. In terms of points then, the Franks led the Romans by 11. The Franks also had 10 more units than their historical opponents. I wondered if this unintentional imbalance would matter, would make a difference.
How It Played & Comments
The Roman left witnessed the first action of the day, when several units of horsemen came into contact. Initially, the melee went against the Equites and Alan horse archers. But then, things quickly turned around and the Frankish cavalry were broken. The loss of all these cavalry units put the Frankish foot on their right in jeopardy. As the fighting on the Roman left developed, the Garrison auxilia fought with the various units of Frankish warriors. These melees went back and forth, and the Romans suffered some losses. The cavalry were able to join in, finally and fortunately. The added weight and mounted attacks from the flank broke the morale of the Franks in this sector and sent the survivors running back to their baseline. Wanting to inflict more damage points, some Romans and Alans pursued. The Frankish warriors, under the direction of their wing leader, put up a stubborn fight, but they were eventually overwhelmed and destroyed.
The contests in the Roman center and on the Roman right were slower to develop. Units of Auxilia Palatina were able to push back some enemy light foot. In the general fighting, however, the Frankish warriors proved almost irresistible. After some heavy fighting, the Roman center had been demoralized with the loss of some auxilia, legionaries, and a unit of Alan heavy cavalry lancers. To be certain, the Romans were able to give almost as good as they got in this sector. The Franks were bloodied, rather disordered as a result, and fairly close to losing heart as well.
For some reason, the Roman right remained in place during the beginning of the engagement. When they finally did get moving, half of their bolt shooters had no viable targets and the “battery” that did, only succeeded in annoying or pushing back the targeted mass of warriors. The Roman legionaries did much better on this flank, resisting the initial furious charges of the Frankish troops and then cutting wide swaths through the enemy ranks. The one-sided nature of the fighting continued to the middle of Turn 7, when another unit of warriors broke after being attacked from the front and flank. This loss pushed the Frankish left wing past its morale break point. With two of three commands demoralized, and all commands battered and bloodied, the Frankish commander decided to withdraw what was left of his army.
A brief survey of the state of the field showed that the Frankish had two commands that were demoralized against just one command for the Romans. While the Roman encampment was threatened, continuing the attack in the center would have placed the Franks deeper into a vise formed by the Roman left and right. The warriors would have been literally squeezed between cavalry and heavy infantry. In terms of losses, the Frankish warriors suffered 54 points of unit casualties. Their determined army breakpoint was 69 points, so they were fairly close. The Romans had taken 36 points of damage. This total out of an army breakpoint of 64.5.
Approximately a day after the tabletop was dismantled, reflection and review suggested that the success of the Roman left changed or established the tempo of the larger engagement. The dissolution of the Frankish right resulted in a measure of risk to their center and so, their entire plan of battle. Frankish warriors can be pretty powerful against regular infantry; according to the QRS Outcome Table, warriors can shatter several troop types if they outscore them. This potential is lessened when it is realized that warriors are usually at a minus 1 or 2 modifier against good infantry. Raiders, such as the Auxilia Palatina, do seem to do quite well in most situations. The Roman artillery (i.e., bolt shooters) seem to have been a waste of points. It occurs to me that a new or work-in-progress Battle Card might be developed that gives units of Roman legionaries integrated light artillery. (This “idea” was inspired by an amendment found in the IMPETVS rules.)
Overall, I thought this was a satisfactory wargame, though it was not one that would write home about . . . My first impression is that the Franks (at least from this particular period) are pretty one-dimensional. Somewhat related, I wondered if I might be forcing or pushing my “operational tempo” and thus, making solo wargaming more work than fun.
Scenario 2: Franks vs Anglo-Normans
For this contest, the Franks were invading again and also had the tactical advantage. The warriors would be fighting in a familiar setting as the Anglo-Normans were “restricted” to waging war in Arable terrain. Additional die rolls and decisions informed that there would be nine pieces of terrain in all, one of these being a coast/coastline. A final terrain roll determined that arrangement 3-3 would be used for this battle between armies separated by approximately four centuries. (Again, please see https://s3.us-east-2.amazonaws.com/wgc- ... let-v2.pdf - Page 3, then Table 3.)
The Anglo-Normans deployed on the near long-edge of my tabletop. Their infantry was arranged in two commands or divisions. These were identical twins. Both formations had the following units: 6 x Bow Levy, 10 x Heavy Foot, and 1 x Knight command stand. The mounted component of their army was positioned in front of the left wing infantry line. This formation consisted of 12 x Knights. The Anglo-Norman army commander was riding with the thirteenth stand of Knights, which was positioned just behind the center of this powerful line of men-at-arms and mounted sergeants. In terms of terrain, the Anglo-Norman army was facing a fairly open expanse of ground. There was a small steep hill forward of the army’s center, and there was a large wood behind the right wing infantry command. The majority of the terrain features landed to the left of the Anglo-Norman deployment. There was a coastline, two large hills (one gentle and one steep), and curiously, a plowed field. There was also a small (i.e., ordinary) patch of rough ground to the right of the gentle hill. For additional visual context, the strong line of Anglo-Norman cavalry had a wide alley between this patch of rough and aforementioned small steep hill in the approximate center of the field.
As for the Franks, they did not bring any cavalry at all to this battle. They divided their warriors into two main groups, and deployed the 16 units of fierce fighters in depth so that each wing or command was a rectangular block, measuring 8 stands by 2 stands. Over on the far right of their deployment, the Franks positioned the rest of their warriors, most of these units were screened by skirmishers. The right-most part of this formation included 6 units of Light Foot or Javelinmen.
Coincidentally, the deployment of both armies saw the Anglo-Normans have an initial advantage on their right flank, as their line of Heavy Foot and Bow Levy extended well beyond the ground occupied by the massed warriors. The question was, however, could this advantage be exploited? The Frankish right extended past the left end of the Anglo-Norman line. The Light Foot and accompanying warriors would have to move quickly to envelop the enemy’s flank and by doing so, perhaps take some pressure off of what was expected to be very hard fighting across the open portions of the field. The following diagram shows how each side was deployed.
(Frankish)
[right] [left]
LF LF LF Wr# Wr Wr Wr Wr Wr Wr Wr Wr$ Wr Wr Wr Wr Wr Wr Wr Wr# Wr Wr Wr Wr
LF LF LF Wr Sk Sk Sk Sk Wr Wr Wr Wr Wr Wr Wr Wr Wr Wr Wr Wr Wr Wr Wr Wr
KN KN KN KN KN KN KN KN KN KN KN KN
KN$
HF HF HF BL BL HF HF HF HF BL BL HF HF HF BL BL HF BL BL HF HF HF BL BL HF HF HF HF BL BL HF
KN# KN#
[left] [right]
(Anglo-Norman)
The Frankish right numbered 16 units and had a value of exactly 48 points. The Frankish center and left also contained 16 units each, and each command amounted to 48 points. As for the Anglo-Normans, their foot commands counted 17 units each, for a calculated point value of 40. Their cavalry formation had 13 units, which added up to 42 points. The Anglo-Normans were outnumbered by just one unit, but they could be concerned with regard to the point difference. The Franks enjoyed 144 points while their opponents employed 122 points.
How It Played & Comments
The first couple of turns were uneventful, as both sides focused on moving their various formations forward. The Anglo-Normans were a bit hampered in this effort, as their long lines of foot contained units of Bow Levy. (These move all of 2 MU—in this case, 6 cm—per turn.) There was no doubt, however, that battle would soon be joined on the Frankish right, as the solid line of warriors was facing off against a longer but thinner line of heavy cavalry.
The next turn witnessed, for all intents and purposes, the first and last clash of the engagement, as the charging Anglo-Norman horsemen fairly rode over the first line of Frankish units. At the end of this very bloody round of melees, six units of warriors had been shattered at the “cost” of a single Anglo-Norman KN unit being forced back. The other close combat was a draw. The immediate impact of this disaster was the demoralization of the surviving Frankish soldiers in this now skeleton of a command.
The fourth turn of the battle witnessed the obliteration of the one Frankish command, as the Anglo-Norman heavy cavalry had pursued into the second line after steamrolling the first line. The effect was much the same. In fact, units of cavalry on the wings of this lop-sided contest started looking for new targets. The group of Franks on the far right, closest to the coastline had essentially taken themselves out of the fight. While their contingent of light foot was making good progress, the warriors and skirmishers were worried about being taken in the flank by enemy horsemen who had tasted victory and wanted more. Over on the other side of the field, fighting had begun between the Franks and half of the line of Anglo-Norman foot. The warriors were able to knock out a couple of units, but were pushed back or involved in drawn combats along the rest of this local front. The uninvolved half of the Anglo-Norman formation started to wheel left in bits and pieces. These units would eventually threaten the flank and rear of the occupied warriors.
The decision was made to call the battle in the middle of Turn 5. Even though the Franks had succeeded in demoralizing the right wing of the Anglo-Normans by breaking 3 units of heavy foot and 2 units of bow levy, a counting and then double-check of figures showed that the Frankish army had suffered a total of 66 points worth of casualties. This amount was very close to their determined breakpoint. A survey of the field also informed that the “victorious” Frankish left would soon be attacked on both flanks by units of heavy cavalry and heavy foot, while the Frankish right was so disorganized as to pose no real threat to the Anglo-Normans.
On review, it appears that my concerns about a points mismatch were unfounded. On review, it appears that I still have much to learn about commanding an army of Early Franks. I should have held back my warriors in the center and concentrated on the flanks, on winning the infantry battle. Warrior troop types, especially when supported, can be quite effective against most heavy foot types. Warriors do not do at all well against Knight-types, especially in open terrain. So, there’s a second item for me to work on as I command these Franks in the next two scenarios: I need to make better use of the terrain.
On reflection, I enjoyed the battle between the Franks and Romans more than I did this one. This was one of those infrequent and I guess interesting to a degree occasions where the battle was over in a matter of minutes, and the rest of the time was spent “filling out the paperwork,” for lack of a better descriptive phrase.
Scenario 3: Franks vs Warring States Chinese
For a change of pace, the Frankish tribes found their lands invaded by some strange-in-appearance (to them anyway) and language, yet very colorfully uniformed invaders. Tired of fighting across Arable ground, the warrior chieftains and their king(s) chose Forest as the topography. Having secured a 6 versus the Chinese 2, a difference of 4 points between the opposing maneuver rolls allowed the Franks to select 10 pieces of terrain for the fictional battlefield. Sufficed to say, there would (no pun intended) be plenty of wooded hills dotting this landscape. (Note: The layout of the table was determined by rolling 1-1. Again, please see https://s3.us-east-2.amazonaws.com/wgc- ... let-v2.pdf for an idea of the placement of the terrain features.)
The Chinese army had the stream to its left. In this sector, the following units were arranged in a line:
Rd Rd Ar EF Pv Pv Pv Ar EF Pv Pv
Ch#
Where Rd are Raiders or “armored men carrying iron clubs,” and Ar represent Archers or “elite crossbowmen.” The EF stands for Elite Foot, which are “elite dagger-axe or halberdmen” and the Pv units are Pavisiers or “mixed formations of crossbowmen behind lines of dagger-axe men.” The Ch# stand indicated the position of the wing or division commander, escorted by 4-horse chariots.
The Chinese center was drawn up in front of the fortified camp. Its deployment was as follows:
Ar EF Ar EF Ar EF Ar EF Ar EF Ch Ch Ch
Ch$
The overall commander of the army was riding in a rather ornate 4-horse chariot, accompanied by over a dozen more vehicles.
Further to the right, there was a third command or corps of troops. The gap between the center and right was covered by a large marsh. Due to additional terrain features in this sector, the right wing of the Chinese army formed up in the following manner:
Ch# HB LF
JC HB LF
JC HB LF
HB LF
Where JC represents Javelin Cavalry or “Heavy horsemen armed with spears and crossbows,” and HB represents Horse Bow or “Light horse archers.” The LF stands were Light Foot. These were “Dagger-axe men rearmed with spear and shield.”
Shifting my focus to the other side of the tabletop, the Frankish army had the stream to its right. As they were not facing KN or heavy cavalry on this battlefield, the commander of the Frankish right wing deployed his men like this:
Sk LF Wr Wr Wr Wr Wr Wr Wr Wr Wr Wr LF Sk
Wr Wr#
Where Sk indicated Skirmishers or “skirmishing bowmen,” and LF represented Light Foot or “Javelinmen.” Wr stands for Frankish Warriors or “fierce fighters.” The commander’s stand or unit is marked with the #.
The Frankish center also contained a couple of units of Light Foot in addition to a mass of Warriors. The army commander was with this formation, his unit indicated by the usual $.
LF Wr Wr Wr Wr Wr Wr Wr LF
Wr Wr Wr Wr$ Wr Wr Wr
Similar to the Chinese right, the left wing of the Frankish army was somewhat removed from the main line of battle. As there was a large marsh about 4 moves directly to its front, this group adopted a comparatively compact formation. The wing commander deployed his men in the following manner:
Sk LF LF Sk
Wr Wr Wr Wr
Wr Wr Wr#Wr
Wr Wr Wr Wr
With regard to numbers and point values, the Chinese had 37 units distributed across 3 commands. These various formations were worth exactly 144 points. The Frankish army matched the Chinese in terms of points on the field. However, the barbarians brought 48 units to this engagement.
How It Played & Comments
As per usual, the initial turns of the battle saw both sides moving their forces forward. The Franks were somewhat inconvenienced by some poor command dice, however. The Chinese were embarrassed by very poor archery as well. The first clash of the engagement took place in the center sector, when a group of Chinese chariots ran into some Frankish warriors and light foot. The chariots did not perform well. One melee was a tie and the second melee saw the chariots evading.
Over the next few turns, the fighting in the center escalated. The Chinese fared better in these chaotic melees, resisting the impetuous charges of the Franks and breaking several of their formations. Eventually, the Frankish warriors were pushed past their breaking point and their center command became demoralized. As fate would have it, the surviving warriors were very close to their general and the command rolls were good enough to allow the warriors to keep fighting. Even with a negative modifier, the Franks proved stubborn and capable. The Chinese general was forced to evade when confronted by a unit of fierce warriors and his center command soon found itself demoralized as well. So, the opposing centers were in tatters. The remaining units on both sides were interested only in living to fight another day by running towards their respective baselines. The Chinese general and his chariot escort were the first to leave the field, riding right through their camp.
On the Chinese left wing, their archers finally found the range and proceeded to break down the Frankish line. At one point, the Frankish units looked like spilled jigsaw puzzle pieces, they were so disordered by effective crossbow volleys. The Chinese took their time on this flank, slowly isolating portions of the Frankish line and then launching front and flank attacks. In the face of annoying and on-target missile volleys, the Franks could not organize a good defense. Around three turns after the Frankish center was demoralized and routing, the Frankish right flank became demoralized and started to disintegrate.
The Frankish left saw perhaps the most interesting or at least most careful fighting of the battle. Here, instead of Frankish warriors storming in and attacking everything in sight, or Chinese Pavisiers and elite foot doling out significant punishment on enemy formations, the light foot and skirmishers faced off and engaged in a protracted contest of wills. The melees went one way and then the other as both sides forced the other back while looking for local advantages. The main body of Frankish warriors pushed a few units into the fighting line, but this was done at the latter stages, as there was some concern that the Chinese chariots might move in their direction, and there was some concern about the Chinese cavalry in this sector. The Chinese were frustrated by terrain and some poor command dice. While their units of light foot did rather well, the Chinese general on this flank had a lot of trouble getting his units of horse bow and javelin cavalry into the action. At one point, this subordinate leader charged into the fray, only to be forced to evade as the Frankish warriors were not impressed at all with his combat ability. (This seemed to be a theme of the larger action, as the general of the Chinese army was forced to evade a few times before his command finally lost heart.)
At the end of 8 turns (approximately 2 hours) of play, a survey was taken of the status of the field and the armies. The center and right commands of the Franks were demoralized. Their army had lost a total of 20 units, for a value of 60 points. The Chinese center had been demoralized and its troops were leaving the field, trying to catch up with their general. The Chinese left and right wings were still in good shape, having lost a couple of units each. The Chinese left would probably mop up some Franks as they took advantage of a very disjointed line. The Chinese right still had a fight on its hands, but, with two-thirds of its army retreating, it did not seem likely that the Frankish left would stay around until the end.
The Franks did a little better in this battle, but still came out on the losing end. I thought their center command performed well, especially after being demoralized by losses. In fact, it was a little bit surprising to see that they were able to “turn the tables” on the Chinese center and forced them to retreat. As for the Frankish right, I think the terrain and the effectiveness of Chinese crossbows combined to spoil their chances in this sector. There was a wooded hill in the path of the Frankish advance; a number of command pips were spent on trying to get units of warriors over this feature. When they finally emerged on the other side, they were greeted by volleys of crossbow bolts and thundering chariot charges. The contest over on the Chinese right flank was, in my opinion, the most interesting part of this scenario. In playing both sub-generals, I did not want to expose my troops to overwhelming odds. I played both sides conservatively and tried to use the terrain to my advantage. The light troops on both sides fought well, I think. Perhaps I should have pushed more Frankish warriors into the melees? Perhaps I should have spent more command points on the Chinese horse bow units so that they could have threatened the Frankish rear? In summary, despite its primitive functional appearance and one or two rule gaffes, this was a rather satisfying engagement and I gained some additional experience.
Scenario 4: Franks vs Tamil Indians
The final “chapter” of this mostly counterfactual “short story” saw the Franks invading the subcontinent. They had the tactical advantage again, but would not be employing any flank march. The nature of the terrain would be rather heavily wooded, almost jungle-like, but not quite. The 2d6 roll determined that landscape 4-5 would be employed, so just one-third or 4 sectors of the 12-sector tabletop would be completely free of terrain. All the other sectors had at least one feature. Initially, I thought there would be a stretch of coastline that might provide a bit of a cooling breeze on the humid day of battle, but upon reviewing the various terrain rules, I discovered that there would be a stream on this fictional field instead. The Indian army would be deploying across the top or far side of the table; the Franks would be arranging their warriors along the bottom or near side. For a change of pace, I am going to try and incorporate pictures with this final battle report. This is being done in order break up the previous nine pages of black & white text, as well as to save the appreciated reader some time.
This final scenario would be another uneven contest. The invading Franks would bring 144 points of troops in 47 units against 133 points of Tamil Indians, represented with 38 units. This gave the Franks an advantage in points (11) and in numbers (9). The Indians did have quite a few elephants, though, and while their Raiders (Valperra swordsmen) were outnumbered 2:1 by the Frankish Warriors, the Raiders were a better troop type in melee. Would this be a battle of attrition then; would this finally see the Franks successful, or would this be another lopsided affair, with the Franks being trampled into the ground by squadrons of elephants?

The right flank or wing of the Indian line. This formation consisted of 3 units of Warband (Chavers), 8 units of Raiders (Valperra swordsmen), and 1 unit of War Elephants. On one of these colorful pachyderms, rode the sub-general of this command. The value of this flank or wing was 45 points, which meant that it would be demoralized with the loss of 15 points worth of troops.

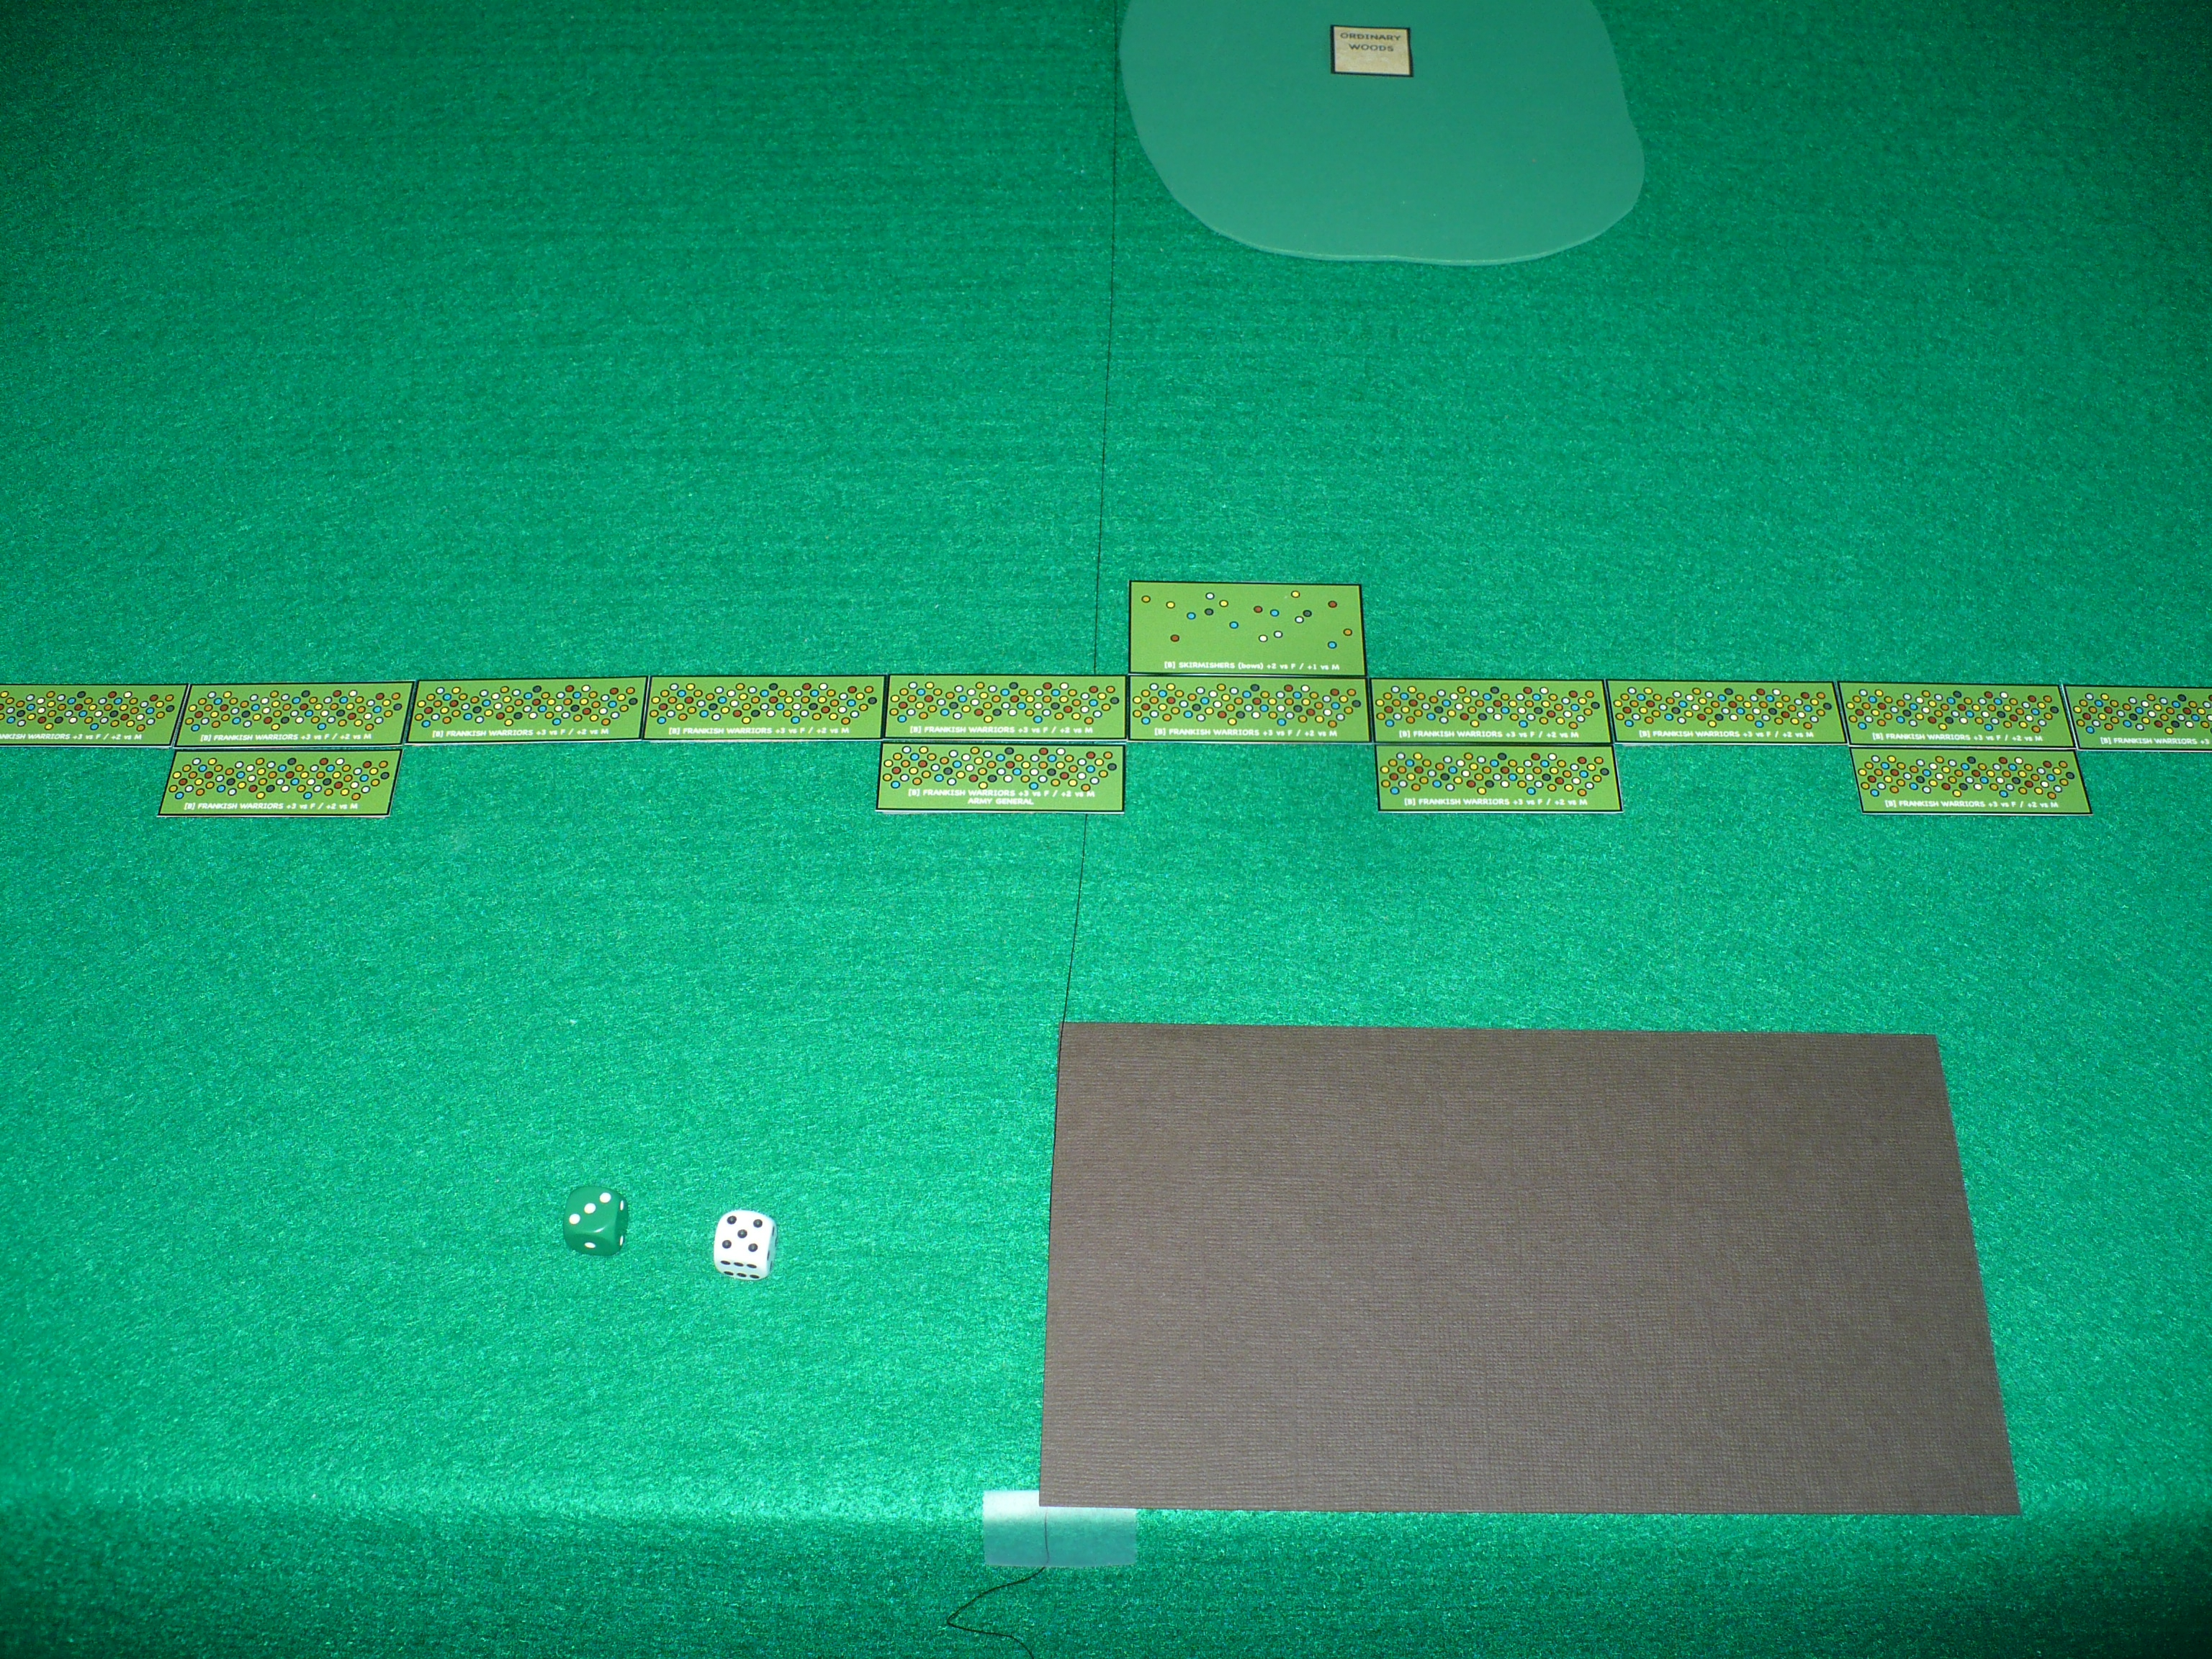
The center command of the Indian army. This corps included 4 units of War Elephants (3 being deployed on the right of the line; the general’s squadron was stationed behind the line), 5 units of Raiders (Valperra swordsmen), and 2 units of Bow Levy (Villikal bowmen). This command was worth 40 points. It would become demoralized when it had taken casualties amounting to 14 points. (Note: The plain-looking piece of tan card behind the formation represents the Tamil army encampment.)

How the Indian left wing was arranged for battle. The large wooded hill behind the left of this line is visible, as is a part of the Frankish line of battle in the upper right corner of the frame. The “terrain threads” are also evident. I used these to mark the various sectors of the tabletop so that terrain could be placed correctly. Anyhow. The Indian left flank contained 1 unit of War Elephants (with sub-general), 3 units of Bad Horse (Kudirai-sevakar horsemen), 6 units of Raiders (Valperra swordsmen), and 1 unit of Skirmishers (Wild tribesmen). The Indian left had a point value of exactly 48, so it would become demoralized after losing 16 points of destroyed/routed formations.

The Frankish left flank, drawn up in front of a large wood and facing an ordinary wood. This formation included 1 unit of Skirmishers, 1 unit of Light Foot, and 14 units of Warriors. Some of the Warriors were deployed with supporting units; most were deployed in a single line. The Frankish left was valued at 48 points. It would become disheartened after losing 16 points worth of troops.
The Frankish center, drawn up before their “representative” camp. In this command, there were 14 units of Warriors, 1 unit of Light Foot, and 1 unit of Skirmishers, so it was identical to the formation on the left of the line of battle. This formation would also be demoralized when 16 of its 48 points were destroyed/routed. The overall leader of the Frankish army was standing here, in a second line unit, surrounded by his warriors.

The right flank or wing of the Frankish force, drawn up before a marsh. This formation included 3 units of Javelin Cavalry (Frankish Nobles) and 12 units of Warriors. The sub-general in charge elected to fight on foot with his fellow warriors instead of sitting on a horse. This formation was wroth 48 points, just like the left and center. It would lose heart when 16 points of its units had been defeated by the enemy.

A close up of the Indian elephants posted on the right of the center formation. I went back and forth about placing these pachyderms between units of Raiders, sort of spreading out their impact and weight, finally deciding to deploy them on the end of the line so that they could act as a separate group if needed.
How It Played & Comments
In his original report, Peter Glew wrote the following about the contest between his Franks and the Pallavas (Tamil Indian): “The general agreement was that with all those elephants we did not stand a chance. 10-0 Defeat.” If a picture is truly worth a thousand words, then I have provided a much longer description and summary of this recently concluded contest. Interestingly, in my scenario, the elephants did not figure as large as they evidently did when Peter and his son faced them. Of the six units of elephants on my tabletop, three were designated as command stands and so, were not placed forward so as to engage in fighting. However, the Indian general did get involved and his troop of pachyderms performed well. Two of the three elephant units deployed in the main line were also involved in a few melees, but command and control issues or limitations rather prohibited their engagement. Early on, it was a cavalry contest. As the battle developed, it was decided between the various infantry formations. Even though they were outnumbered, the Indian Raiders were slightly better in quality and, as seen in the provided photos, they usually had the better dice. The Franks were not completely shut out, to employ a sports phrase. They did manage to demoralize the Indian left, but only after some hard fighting. Against the Indian center and right, the Franks only routed a total of 4 enemy units. Counting the “broken or dead unit pile” on the Frankish side of the table, there were 8 on the right, 6 in the center, and 4 on the left. Adding the value of these units, I arrived at 59 points. As just stated, the Indians lost 2 units on their right and 2 in the center. On their left, a total of 7 units were broken/destroyed. (This number included all of their cavalry, units which had done very well in my opinion.) Checking my addition, I found that the Tamil army suffered 38 points worth of losses.

In Turn 2, the cavalry of both sides meet in the first clash of the battle. Evidently, the Frankish Nobles did not “have their Wheaties” for breakfast, and so lose the first melee and have to fall back.

The Indian center is plagued with a series of poor command rolls. It costs 1 additional command point to move elephants, and the Indian army general wanted to keep his formation together. Unfortunately, the dice gods did not smile upon him or his elephants for three successive turns. Admittedly, he could have marched his Raiders forward but then his command would have been divided.

The last unit of Frankish Nobles puts up a stubborn fight even when attacked from two directions. Concerned about the threat to his flank, the Frankish sub-general in this sector detaches a few units of Warriors to prevent the Indian cavalry from attacking his right and or rear.

At the close of Game Turn 5, things are not going very well for the Franks. Their left wing formation disordered by the terrain, the Warriors are set upon by an orderly line of Indian foot. Despite a drawn melee, the Frankish infantry is forced to fall back or, in this specific instance, is overwhelmed and defeated. (The white dice show the unit melee factor; the colored dice show the combat roll. The Indians have scored 8 versus a 2 for the Franks.)

The dice finally smile upon the Indian center and its foot troops are able to move forward and engage the enemy. The elephants are still lagging behind. The Franks are stymied here as well, and suffer the loss of a unit of Warriors in several rounds of melees.

Over on the Frankish right, their infantry are in a bit of trouble. The enemy has advanced and taken advantage of the shortened line of Warriors. The Indians have not attacked with their units of Bow Levy, but have used their Raiders to push the Franks back along the line as well as attack them on either flank. The morale of the Franks is starting to suffer here. They have lost 14 points versus just 3 points against the Indians.

The black circles/markers on the various units represent demoralization. In this sector of the tabletop (the Frankish right and Indian left), the Franks were the first ones pushed past their morale tipping point. However, the Indian command soon followed. The fighting in this area of the field was that hard and that costly.

Command and control basically fell apart in this sector, with both sides rolling a 1. The Franks has already lost their leader so it was essentially every unit for itself. The Indian formations, having reached their determined demoralization level, also turned around and headed for the friendly edge of the battlefield.

This melee, featuring Bow Levy versus Warriors, would mark the beginning of the end of the Frankish center, and result in a called Tamil win. Here, the poor quality Indian units are able to “snatch victory from the jaws of defeat.” The abysmal Frankish die roll certainly helped.

In the second of three melees, the Franks find themselves outscored and overwhelmed. Here, Indian Raiders (i.e., Valperra swordsmen) gang up on an isolated unit of Warriors and send them routing away.

Perhaps fittingly, the Indian army general and his elephants deliver the “knock out blow” against the Frankish army. On reflection, the Indian elephants did not play a significant role in the battle. The majority of the fighting was done by the Indian horsemen and foot units. Here, yet another terrible roll by the Franks results in the destruction of another unit of Warriors, which drives the Frankish center to its demoralization point as well as past it.
Evaluation
In revisiting Peter Glew’s experience or experiment, I did not manage to secure a single win as the commander of the Frankish army. Fortunately, as a solo wargamer, I was able to win four straight battles as commanders of the armies opposing the evidently helpless (or is it hopeless?) Franks. So, it seems that I could look at my “generalship” as well as the rules used. On both topics, it seems quite apparent that I need more practice, even though I have been playing at war for a little more than three decades now. As for my playing with the TRIUMPH! rules, well that has only been going on for about a year. To be sure, I am no expert with these rules. As reported in the several reports offered here, no wargame was played to an official conclusion. This was a personal decision. It simply seems to me that once an army has lost two-thirds of its fighting ability, once most of an army has become demoralized, the proverbial writing is pretty much on the wall.
Looking back over the army lists, I noted that only one of these four contests would qualify as historical. From a strictly chronological point of view, I could have also included the Later Tamil Indians, but as I opted to have a few units of Warband in my army, this put them in quite a different time period. Given the poor performance of the Franks (again, at least under my leadership), I have to wonder if they would have done better, perhaps earned a couple of wins, if they had fought against historical enemies.
I suppose I should have paid more attention to Peter’s findings and “recommendation.” Had I done so, I could have saved myself some time and effort. I could have also saved the well regarded reader the time and effort of wading through this rather but necessarily lengthy post.
I have no regrets about imitating or trying to imitate Peter’s original effort. It was not my intention to flatter him by doing so. However, I do thank him for providing the inspiration and for giving me (however indirectly) something to do. While I did enjoy the experience and experimentation, I don’t think I will be developing a similar project anytime soon. Further, I don’t think that I will be fielding the Early Frankish for quite some time, if at all. I have to say, based on recently staging and writing up several solo battles over a relatively short period of time, I admire those gamers who attend tournaments and shows where they play 4 or 6 wargames over the course of a weekend. Frankly speaking (no pun intended), I doubt that I could muster the stamina required.
Notes:
- Ideally, I should like to emulate the brevity, content, and style of most of the authors who post reports of the games they have played on The Society of Ancients Forum, in the “What was the last game you played?” section. Here are three fairly recent examples, from, respectively, the desks of Mick Hession, Duncan Head, and Peter Kershaw:
DBMM last night at 400 points (only the second Ancients game I've played in 6 months). My Tibetans invaded T'ang China. The T'ang army was bigger than mine so my cunning plan was to skirmish on my left and concentrate on my right where my cataphracts could expect to punch through the opposition but if you have a cunning plan then it's a good idea to deploy accordingly and like a muppet I didn't so ended up fighting on a wide front. D'oh! My left wing was particularly stretched and had to form a single line with no reserves and although the cataphracts held their supporting light horse predictably collapsed against heavier opposition and the command broke after a couple of bounds fighting. This disheartened my right wing but my cataphracts had inflicted heavy losses themselves so with my army teetering on the brink I threw everything I had at the Chinese cavalry and managed to break the T'ang centre. Its flight created a domino effect and the Chinese broke to give me a very hard fought win.
—————————————————
I also played a 400 AP DBMM game last night, my Ritsuryo Japanese against Jon Smith's Anglo-Normans (Robert de Belleme's rebels of 1102, or thereabouts). The Japanese invaded England and took up the usual defensive deployment, resting the right wing on an English town and the left, for lack of any other suitable terrain, angled back to the baseline. The Anglo-Normans had a right wing of mounted knights screened by Welsh auxilia, a centre of mostly fyrd Spears (Inferior) (plus a few Welsh horse who sat in the rear all game) and a left wing of dismounted knights as Blades (Superior) supported by archers, with a few Ostmen mercenary axemen Blades (Ordinary) and some more spearmen to bulk them up. After slowly manoeuvring to a position parallel with the Japanese the Normans advanced, taking a little damage from my shooting, though the formations were somewhat broken up. The mounted knights destroyed some Hordes and artillery on my extreme left and eventually, with the help of the dismounted knight general of the centre command, disheartened the Japanese left. Meanwhile the Japanese infantry in the centre were very resilient against the fyrd and killed heaps, disheartening them in turn. The dismounted knights broke several elements of Japanese right-wing infantry only to be halted in an indecisive melee when charged by the reserve cavalry.
There we ran out of time and had to stop and call it a draw. I think on the whole the Normans were in a better position. A tense and interesting game where both players thought at different stages that they had lost.
—————————————————
Last weekend, I played a couple of games at the Derby leg of the DBMM Northern League. It is theoretically a doubles competition but people often play solo. Lists were restricted to roughly pre-300BC or a bit later if chariots were used. My partner and I settled on a Gallic list, the Aquitanian option with a Spanish ally. I had tried out a similar version a few weeks ago - the main differences being that the Northern League games are at 450 points and I had painted up enough foot elements for the chariots to dismount. First game was against a Skythian army. We defended. We had a marsh covering the left of our infantry, a rough hill right of centre and a built up area in his deployment area facing our right. Another rough hill covered our rear right flank. We had one Gallic command on our left with its chariots behind to cover anyone coming between the marsh and the table edge, another Gallic command in the centre with its cavalry behind to send right in support of the Spanish, Gaesatae on the rough hill and the Spanish facing the BUA. The Spanish were unreliable, so we were unable to swarm the BUA which was held by a few Skythian psiloi. His light horse on that wing held back to avoid activating the Spanish, with only a couple sent forward to threaten the Spanish flank.
Our Gallic foot pushed forward. His light horse didn't really have anywhere to go to the sides, so tried some frontal charges. I know from my own experience that this can bear fruit, but his best chances were against the Gaesatae (being WbF) and these were protected by the hill for most of our advance. We gradually whittled away at the light horse so he was starting to have to send in the heavier cavalry - these have better odds but stand a chance of being destroyed rather than being spent. The Spanish eventually got into action but hadn't the time to do more than kill a couple of light horse. Right at the end of the game, we sent our chariots on our left into a smaller number of Skythian ordinary cavalry, and of course lost a couple of our chariots. These were some of our main losses and his losses were mostly spent light horse. On paper, it looked like an inconsequential draw, but there was action and combat going on across the line for most of the game. We had broken through the LH in various places, though his speed would probably have allowed him to get most of his troops out of trouble.
Interesting analysis and an impressive effort, Chris. Experimentation using repeated trials (even v different opponents) is a good way forward in understanding the problem you are attempting to tackle with your Franks. Not being a user of these rules or a tournament player, I may be missing the point completely.
ReplyDeleteNow, if I may be Frank (!), what has been uncovered or discovered in this exercise? Have you developed a deeper understanding on the Frankish Way of War or have you pinpointed shortfalls in sub-optimal list building for tournament play? Has the rules' developer built a Frankish Army List that is not competitive in tournament play? Why this outcome? Is not the whole purpose of Army Lists in this type of contest to ensure competitive armies on the table? If the Franks find themselves often on the losing end of any contest, perhaps the list is not properly calibrated. What changed to existing Frankish Army Lists would be needed to give the Franks an even shot at victory?
I browsed through my stack of old MWs and #143 is in my pile if the article referenced early-on is of interest to you.
As always, thanks for a comprehensive and thought-provoking post.
Jon,
DeleteThanks for compliments regarding my rerun of Peter's experiment with Franks/Early Franks.
I had no greater point, as I recall, and as your penetrating questions showed, I need to work on my "reporting" or at least stick with something resembling a plan.
I may well inquire after that article in MW 143, but for now, I find my hands rather full. Editing some almost-done posts and finishing another. You will be relieved to know that none of these posts-in-queue concern Franks.
Then again, later on, it might be interesting to look at other rules and use Franks, or even try to find a historical battle featuring Franks. Besides Tours, that is.
Thanks again for weighing in and pointing me in a better direction.
Cheers,
Chris